Gmail is a very Popular Online Email Messaging Service provide by Google without any cost. Gmail has many features for various uses but does not allow us to send schedule Emails or Email at a later date .
1. By using Google script : - This is the very popular and best way to send schedule emails.For, we shall give a lot of thanks to Amit Agarwal who made this script. This script is free of cost.
1. Install the script CLICK HERE .
2. Now , open the script, click on Gmail Scheduler, now a drop down menu will appear, and then click on Step 1: Authorize and grant permission.
3. Now, again click on, Gmail Scheduler and click on "Step:2 : Fetch Messages" to import all emails which is saved in Gmail account as Draft.
Note :- For using this script , you have to first create emails which you want sent at a later date on Gmail.com and saved them as Draft. Then after you can import or fetch them in this Google script.
4. Now, set the schedule date and time in the Scheduled Time box. Only double click on this and choose the time from the calendar when do you want to send emails.
5. Now, after set the delivery time, again click on Gmail Schedule and choose Step 3 : Schedule Messages.
2. By using Microsoft outlook : - It is the very easiest way to send schedule message.You can schedule a single email.
For a single email
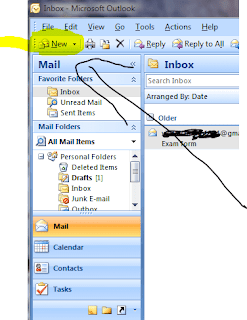
1. Open Microsoft Outlook as usual.
2. Then, click on NEW to create a email for send in later date.
3. Now, a pop up window will appear, then create your emails which you want to send.
4. Now, click on Message > More Option .
5. Now, a pop up window will appear, then select Do Not deliver Before. Now, set Date and Time.
6. Now , close the window.and then click on Send. Now, your email remains in the Outbox folder until the deliver time.
Note: If you are using POP 3 account, then Outlook must be remain open until the message is sent.If you don't know, what type of account you are using, then click on Tool Menu > Setting > Account Setting. Then look at the Email option, your email address will be there.
Watch Video
3. By using Boomberg add on : - The good fact of this fact, after installing this extension, a send later option will be added in the Gmail account. And the bad fact of this is that, its not free, you can send only 10 schedule email per month.For professional or unlimited use, you have to subscribe this extension.
How to/
1. Install BOOMBERG add on on your browser CLICK HERE .
2. After install, log in to your Gmail account, then during login, a message box will appear, then click on Start then Next.
Note : You must Allow pop up otherwise pop up authorization message will not appear.
3. Now, click on Compose for sending an email as usual. When you composing an email, you will see a extra option Send Later.
see below picture
4. Now, set your date or time. Then click on confirm, then a pop up window will appear for a first time only for a permission, then click on Accept. Now, your schedule message is ready.
Tips :- You can also set a message to be resent as a reminder. done


0 Response to "How To Schedule Email in Gmail to Send Later : 3 Ways"
Post a Comment